Flutter is one of the most popular frameworks among application developers looking to build native chat apps for different platforms in a short time. Firebase, on the other hand, allows integrating real-time abilities into the app along with powerful storage and security.
Combining Flutter and Firebase technologies enables businesses to create a feature-packed, user-friendly, scalable chat app for their users with the help of a Flutter application development company.
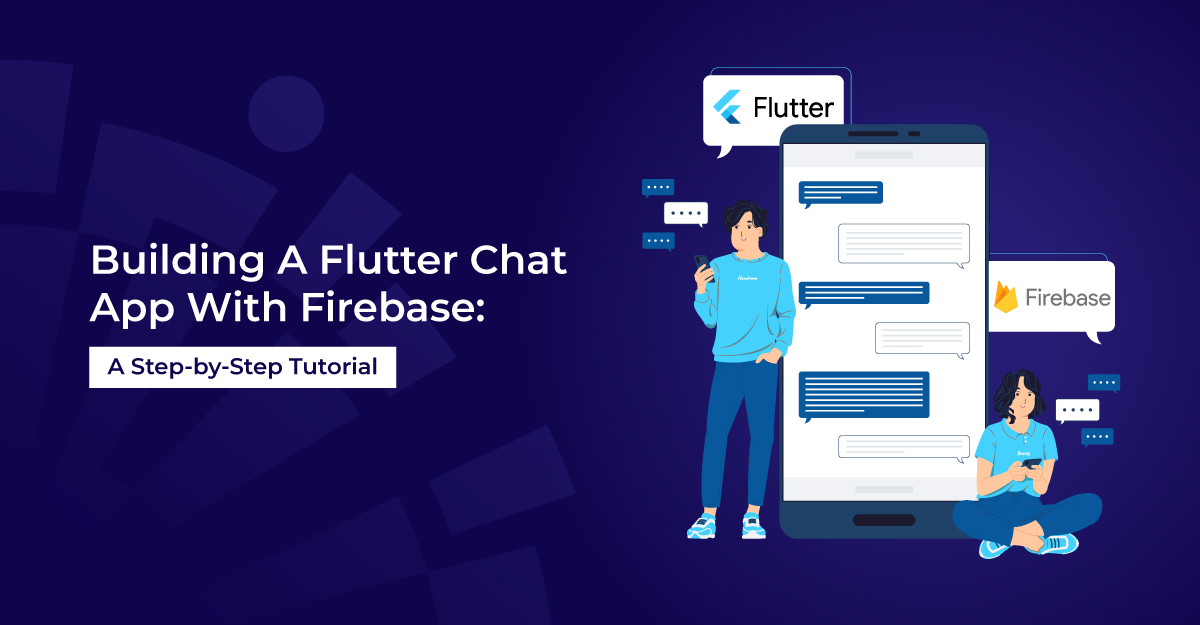
In this tutorial, we discuss how to build a chat app in Flutter with Firebase integration. This post will give you an idea of how popular Flutter chat applications work with a technology like Firebase at its backend.
Why Should You Choose Flutter For Your Chat App?
Flutter is a robust Google framework designed to help developers build powerful applications quickly. This platform has several advantages and features that make it the best choice for a chat app development, but here are the top reasons you should choose Flutter for your application.
- User-friendliness – Flutter offers a large number of widgets that can be quickly customized to create an amazing user interface for your app. With support for Android and iOS native visual styles, it is easy for Flutter mobile app development services to build a chat app that has a modern, beautiful, native-like user interface
- Quicker development – Flutter offers a powerful Hot Reload feature that enables developers to speed up the development process with real-time code changes and preview. There is no need to wait for the application to reload after making changes to the code; you can keep working on improving the features and fixing problems without any disturbance. Using Flutter cuts down the chat app development time by almost half, while maintaining the quality
- Better performance – The most important feature of a chat app is response time; delayed messages can put off users. Flutter apps need not request access from the platforms they want to connect to, reducing the start-up time and chances of performance issues to a great extent. A Flutter application development company enjoys the advantage of building a chat app that runs as quickly and effectively like any other native application.
- Cross-platform compatibility – As Flutter is a cross-platform framework, it facilitates developing chat apps that run on different devices and even older versions of these devices and operating systems from a single codebase. There is no need to build dedicated apps for desktops, mobile devices, web browsers and different operating systems. Flutter can create applications that run on different formats and screen sizes because of its powerful design features
- Time and cost saving – The cross-platform compatibility of the platform makes it easy to save time and expense. Flutter mobile app development services can write a single codebase that runs on multiple platforms and it is easy for QA teams to test the app faster. As there is no need to hire multiple teams for development, testing and managing different versions, businesses can save time and money. This also makes Flutter an excellent option for those who want to get their chat apps quickly to the market.
Why Should You Integrate Firebase Into Your Chat App?
Firebase is a Backend-as-a-Service that offers a wide range of tools and services you can use to build high-quality applications at a faster pace. Modern chat apps demand newer capabilities and features to match up with the newest communication trends. Firebase can prove to be an excellent option for building secure and robust chat applications.
Let us look at some of the major reasons a Flutter application development company should choose to integrate Firebase into their chat apps.
- Security – Authentication is one of the most important features for applications that involve multiple users. Setting up a login with email, password, or Facebook/Google sign in into your app is easy with Firebase. This service also protects the data stored in the cloud.
- Real-time database – Firebase offers real-time, cloud-based databases to help store and sync data between users. This makes it easy for developers to access data from any device and come up with collaboration features.
- Quick bug fixing – Applications are often seeing suffering due to bugs that slow down navigation, resulting in opt outs and declined ratings. However, Firebase offers the ability of crash reporting to be able to fix bugs easily and quickly. App developers and testers in Flutter mobile app development services can use the crash logs to identify the problem stage, whether it is the device, operating system, or the app version.
- In-app advertising – Firebase comes equipped with AdMob, an in-app advertising facility that helps businesses run advertisements for monetization purposes. You can also choose from a variety of templates to enhance the user experience.
Now that we know how Flutter and Firebase technologies can work together for your chat app, let us see how you can use them to build a feature-rich messaging application.
Part I: How To Build Your Chat App In Flutter
In this step-by-step guide, we demonstrate how to build a chat application that works on Android devices to allow users to send and receive messages.
Here, Android Studio is used as the development environment and the Chat SDKs from MirrorFly to integrate the messaging functionality into the application. Minimum requirements for this app development include:
- Android 4.4 or later
- Flutter 2.0.0 or later
- Firebase account
- Dart 2.12.0 or later
- MirrorFly Chat SDKs and Licence key
Step 1: Get Your Chat Sdks And Licence Key
To build a Flutter chap app, we start by creating an account with MirrorFly. Enter your basic details and verify the account through the verification link sent on your email address. Once registered, you can log in to MirrorFly to see the options for downloading the SDK for iOS, Android, and web. Follow these steps to get your license key:
- Download the Flutter SDK Package for Android
- Extract the SDK files on your device
- Go to your account dashboard on MirrorFly
- Note your License key
Step 2: Get Started With Your Chat App Project In Android Studio
The second step of your Flutter chat app development involves creating an Android project with Flutter as the development language. Follow these steps to do this:
- Open the Android Studio development environment
- Start adding the basic details of your project into the window that opens
- Next, import the dependencies from your Downloads folder to the App Folder of your project
- Now add the pubspec.yaml file
- You also need to enter a line of code in your gradle.properties to make sure there are no library conflicts between the uploaded files
android.enableJetifier=true Moreover, you need permissions to access various project components. Add the codefollowing lines to the AndroidManifest.xml to grant these permissions.
<uses-permission android:name="android.permission.INTERNET"/>
<uses-permission android:name="android.permission.ACCESS_NETWORK_STATE"/>
Now, configure the license key that you got from your MirrorFly dashboard with this code.
plugins {
           	...
           	id 'kotlin-android'
           	id 'kotlin-kapt'
}
android {
           	compileOptions {
	       	sourceCompatibility JavaVersion.VERSION_1_8
	       	targetCompatibility JavaVersion.VERSION_1_8
           	}
           	kotlinOptions {
	       	jvmTarget = '1.8'
           	}
            	packagingOptions {
	       	exclude 'META-INF/AL2.0'
	       	exclude 'META-INF/DEPENDENCIES'
	       	exclude 'META-INF/LICENSE'
	       	exclude 'META-INF/LICENSE.txt'
	       	exclude 'META-INF/license.txt'
	       	exclude 'META-INF/NOTICE'
	       	exclude 'META-INF/NOTICE.txt'
	       	exclude 'META-INF/notice.txt'
	       	exclude 'META-INF/ASL2.0'
	       	exclude 'META-INF/LGPL2.1'
	       	exclude("META-INF/*.kotlin_module")
           	}
}
In the app/build.gradle file of your Flutter project, add the following dependencies:
dependencies {
            	... // your app dependencies
            	implementation files('libs/appbase.aar')
           	implementation files('libs/flycommons.aar')
           	implementation files('libs/flynetwork.aar')
           	implementation files('libs/flydatabase.aar')
           	implementation files('libs/videocompression.aar')
           	implementation files('libs/xmpp.aar')
  }
Configure as shown below:
dependencies {
           	... // your app dependencies
           	configurations {
 	      	all {
     	  	exclude group: 'org.json', module: 'json'
     	  	exclude group: 'xpp3', module: 'xpp3'
 	      	}
           	}
           	//For lifecycle listener
           	implementation 'android.arch.lifecycle:extensions:1.1.1'
           	annotationProcessor 'android.arch.lifecycle:compiler:1.1.1'
           	//For GreenDao
           	implementation 'de.greenrobot:greendao:2.1.0'
           	//For gson parsing
           	implementation 'com.google.code.gson:gson:2.8.1'
           	//for smack implementation
           	implementation 'org.igniterealtime.smack:smack-android:4.4.4'
           	implementation 'org.igniterealtime.smack:smack-tcp:4.4.4'
           	implementation 'org.igniterealtime.smack:smack-im:4.4.4'
           	implementation 'org.igniterealtime.smack:smack-extensions:4.4.4'
           	implementation 'org.igniterealtime.smack:smack-sasl-provided:4.4.4'
           	implementation 'androidx.localbroadcastmanager:localbroadcastmanager:1.0.0'
           	implementation 'androidx.multidex:multidex:2.0.1'
           	implementation 'com.google.android.gms:play-services-location:17.0.0'
           	//Dagger Dependencies
           	api 'com.google.dagger:dagger:2.40.5'
           	kapt 'com.google.dagger:dagger-compiler:2.40.5'
           	api 'com.google.dagger:dagger-android:2.40.5'
           	api 'com.google.dagger:dagger-android-support:2.40.5'
           	kapt 'com.google.dagger:dagger-android-processor:2.40.5'
           	//coroutines
           	implementation 'org.jetbrains.kotlinx:kotlinx-coroutines-android:1.3.8'
           	implementation 'org.jetbrains.kotlinx:kotlinx-coroutines-test:1.3.8'
           	//apicalls
           	implementation 'com.squareup.retrofit2:retrofit:2.6.1'
           	implementation 'com.squareup.retrofit2:converter-gson:2.6.1'
           	implementation 'com.squareup.okhttp3:okhttp:4.2.0'
           	implementation 'com.jakewharton.retrofit:retrofit2-kotlin-coroutines-adapter:0.9.2'
           	//stetho interceptor
           	implementation 'com.facebook.stetho:stetho-okhttp3:1.3.1'
           	//okhttp interceptor
           	implementation 'com.squareup.okhttp3:logging-interceptor:3.14.3'
           	//shared preference encryption
           	implementation 'androidx.security:security-crypto:1.1.0-alpha03'
           	//for mobile number formatting
           	implementation 'io.michaelrocks:libphonenumber-android:8.10.1'
 }
buildTypes {
  debug {
           	buildConfigField 'String', 'SDK_BASE_URL', '"<a href="<a href=" https:="" api-preprod-sandbox.mirrorfly.com="" api="" v1="" ""=""></a><a href="https://api-preprod-sandbox.mirrorfly.com/api/v1/" ...<="" a="">">https://api-preprod-sandbox.mirrorfly.com/api/v1/"...</a> '"="">https://api-preprod-sandbox.mirrorfly.com/api/v1/"...            	buildConfigField 'String', 'LICENSE', '"xxxxxxxxxxxxxxxxxxxxxxxxx"'
           	buildConfigField 'String', 'WEB_CHAT_LOGIN', '"<a href="<a href=" https:="" webchat-preprod-sandbox.mirrorfly.com="" ""="">https://webchat-preprod-sandbox.mirrorfly.com/"</a> '"=""><a href="https://webchat-preprod-sandbox.mirrorfly.com/" '<="" a="">">https://webchat-preprod-sandbox.mirrorfly.com/"'</...</a>            	buildConfigField "String", "SUPPORT_MAIL", '"contussupport@gmail.com"'
  }
}
Step 3: Initialize The Chat Sdks
Navigate to the onCreate() method in the Android Application Class and add the ChatSDK builder. With this step, you can get started with SDK initialization with all the necessary details.
Kotlin://For chat logging
LogMessage.enableDebugLogging(BuildConfig.DEBUG)
ChatSDK.Builder()
.setDomainBaseUrl(BuildConfig.SDK_BASE_URL)
.setLicenseKey(BuildConfig.LICENSE)
.setIsTrialLicenceKey(true)
.build()
Step 4: Register a User
After the initialization of the SDK, the next step is to register the user with the help of USER_IDENTIFIER and FCM_TOCKEN. As shown below, you can either create the user in the sandbox or live mode.
Flutter:FlyChat.registerUser(USER_IDENTIFIER, FCM_TOCKEN).then((value) {
if (value.contains("data")) {
// Get Username and password from the object
}
}).catchError((error) {
// Register user failed print throwable to find the exception details.
});
After registering the user, the server connects automatically.
Step 5: Start Using The App To Chat
1.Send a message
To start sending messages from the Flutter app, use the sendTextMessage() method.
FlyChat.sendTextMessage(TEXT, TO_JID, replyMessageId).then((value) {
 	// you will get the message sent success response
 });
2.Receive a message
Use the onMessageReceived() method to get notified about an incoming message.
<code>
FlyChat.onMessageReceived.listen(onMessageReceived);
void onMessageReceived(chatMessage) {
 	//called when the new message is received
 }
Finally, you have built a Flutter chat application capable of sending and receiving messages. We now move on to Firebase integration for the app we just developed.
Part II: Steps To Integrate Firebase To Your App
Once you have your chat app ready with the help of a Flutter application development company, you can now proceed to integrate Firebase services to the messaging app.
Step 1: Create A Firebase Project
The first step is go to the Firebase console and create a new project with the name of your Flutter app. We can assume the name to be com.testapp for reference.
Step 2: Configure Your App Info In The Console
You need to execute the below mentioned steps to store your app configuration info in the Google Developer Console.
- Go to Google Console
- Go to your project and then settings
- Choose Cloud Messaging to see the google-service.json file
- Download the file and add it to the App folder in your project
Step 3: Add Firebase Dependencies
After setting up configuration, you need to add these dependencies for Firebase. Go to build.gradle and enter these repositories
buildscript {
	repositories {
    	// Check for this line  (if not, add it):
    	google()  // Google's Maven repository
   }
   dependencies {
   	classpath 'com.google.gms:google-services:4.3.13' // google-services plugin
   }
}
 allprojects {
   repositories {
   	// Check for this line (if not, add it):
   	google() // Google's Maven repository
   }
}
Now, add the required plugins
apply plugin: 'com.android.application'
apply plugin: 'com.google.gms.google-services'
 dependencies {
  implementation platform('com.google.firebase:firebase-bom:30.3.1')
}
You have now successfully integrated Firebase into your chat app. Let us see how you can set up push notifications.
Step 4: Firebase Integration For Push Notification
Your Android chat app can be set up to send push notifications with Firebase. To do this, follow these steps to add the FCM dependency from the build.gradle.
<p>implementation 'com.google.firebase:firebase-messaging:23.0.6'</p>
<service android:name=".MyFirebaseMessagingService"
         android:exported="false">
    <intent-filter>
    	<action android:name="com.google.firebase.MESSAGING_EVENT" />
    </intent-filter>
</service>
The next step is to create a MyFirebaseMessagingService file in the app to extend the FirebaseMessagingService.
Java:public class MyFirebaseMessagingService extends FirebaseMessagingService {
@Override
public void onMessageReceived(@NonNull RemoteMessage message) {
//Push message appears when push notification triggered for this device
}
@Override
public void onNewToken(@NonNull String token) {
//This method activates when there is a change to the Device token
PushNotificationManager.updateFcmToken(token, isSuccess, message) -> {
});
}
}
Kotlin:
class MyFirebaseMessagingService : FirebaseMessagingService() {
	override fun onMessageReceived(message: RemoteMessage) {
    	//Push message received when push notification triggered for the device
	}
	override fun onNewToken(token: String) {
    	//this method is triggered when Device token gets changed/updated
    	PushNotificationManager.updateFcmToken(token, object : ChatActionListener{
        	override fun onResponse(isSuccess: Boolean, message: String) {
            	}
    	})
	}
}
Use this link to enable cloud messaging
Firebase Cloud Services Messaging
To be able to receive calls and messages from Chat SDK, you need to authenticate cloud messaging. To do this,
Go to Cloud Messaging – Project Setting
Copy the API key
Configure the key in the server
Add the permissions to the AndroidManifest.xml
<uses-permission android:name="android.permission.INTERNET" />
<uses-permission android:name="android.permission.ACCESS_NETWORK_STATE" />
Next, add the following for adding a device token
Java:FirebaseMessaging.getInstance().getToken()
.addOnCompleteListener(new OnCompleteListener<String>() {
@Override
public void onComplete(@NonNull Task<String> task) {
if (!task.isSuccessful()) {
//Fetching FCM registration token failed
return;
}
//Fetching FCM registration token succeed
// Get new FCM registration token
String token = task.getResult();
PushNotificationManager.updateFcmToken(token, isSuccess, message) -> {
});
}
});
Kotlin:
<code>
FirebaseMessaging.getInstance().token.addOnCompleteListener(OnCompleteListener { task ->
        	if (!task.isSuccessful) {
                //Fetching FCM registration token failed
                return@OnCompleteListener
        	}
        	//Fetching FCM registration token succeed
        	// Get new FCM registration token
        	val token = task.result
  	      PushNotificationManager.updateFcmToken(token, object : ChatActionListener{
        	override fun onResponse(isSuccess: Boolean, message: String) {
            	}
        	})
    	})
An Example Flutter Chat App With Firebase Integration
Let us look at a demo chat app creation to help you understand how Flutter applications with Firebase integration work. In this demo, we also design the user interface of the messaging app.
Creating A New Flutter Application
Go to Android Studio and click on the button for New Flutter Project and it confirms the SDK path after which you can click on Next and enter the project name. Next, choose the directory and ensure that you select web, iOS, and Android platforms. Now you have your Flutter demo project created.
Connecting To Firebase Services
If you intend to use Firebase as your backend, it is advisable to connect the project to Firebase before any further programming. To do this, visit firebase.google.com and create a new Firebase project. There are many ways to integrate the technology into a Flutter app but any Firebase app development company in India would go with the simplest method.
Enter the name of your project and click on Create Project while disabling Google Analytics. You can now initialize Firebase right from your Flutter programming. Add the core plugin by running the command from the root of the project in the terminal window.
flutter pub add firebase_core
Next, you need to run the FlutterFire CLI command.
dart pub global activate flutterfire_cli
Run the following command and select the Firebase project you created
flutterfire configure
Once you run this command and connect to the Firebase project, you will notice firebase_options.dart file in the project structure with all the necessary information.
Edit the main() function in the main.dart file and make sure WidgetFlutterBinding is initialized. To initialize Firebase, run the code:
void main() async {
  WidgetsFlutterBinding.ensureInitialized();
  await Firebase.initializeApp(
	options: DefaultFirebaseOptions.currentPlatform,
  );
  runApp(MyApp());
}
Now you are ready to use FlutterFire and associated services. Right-click on /gradlew and open with the terminal to run the command:
<code>./gradlew signingReport
The signing report is created for your app after which you can add the SHA-1 and SHA-256 certificate fingerprints to your Firebase project.
To do this, click on the Authentication tab in the project, then click on the Sign-in method and add Google under Sign-in providers.
Designing A Basic UI For The Flutter Chat App
Our demo messaging app has a total of five screens namely
1. Splash – This screen has two text widgets and an image in the middle.
2. Login – This again has two widgets for text, an image, and a Google sign in button.
3. Home – The homepage has two action buttons for logging out and profile. It also has a search bar for searching users.
4. Profile – Users can add information about them and change their display name. They can also upload an image.
5. Chat – This page resembles the chat screen on most chat apps with message part at the top and text field and send button at the bottom.
Building A Homepage With Contacts
Step 1: The HomeProvider class
There are two functions under this class.
1.Update data on the Firestore databaseFuture<void> updateFirestoreData(
String collectionPath, String path, Map<String, dynamic> updateData) {
return firebaseFirestore
.collection(collectionPath)
.doc(path)
.update(updateData);
}
2.Receive a snapshot of data from the database
Stream<QuerySnapshot> getFirestoreData(
   String collectionPath, int limit, String? textSearch) {
 if (textSearch?.isNotEmpty == true) {
   return firebaseFirestore
   	.collection(collectionPath)
   	.limit(limit)
   	.where(FirestoreConstants.displayName, isEqualTo: textSearch)
   	.snapshots();
 } else {
   return firebaseFirestore
   	.collection(collectionPath)
   	.limit(limit)
   	.snapshots();
 }
}
Step 2: Homepage
This page has three sections like most chat app home pages designed by Firebase app development company in India.
1.The AppBar – contains a sign out button and a profile page buttonScaffold(
appBar: AppBar(
centerTitle: true,
title: const Text('Smart Talk'),
actions: [
IconButton(
onPressed: () => googleSignOut(),
icon: const Icon(Icons.logout)),
IconButton(
onPressed: () {
Navigator.push(
context,
MaterialPageRoute(
builder: (context) => const ProfilePage()));
},
icon: const Icon(Icons.person)),
]),);
2.The search bar – it helps search for logged-in users in the app and comes handy when you have a long list of users. A StreamBuilder can be used to create a search bar:
Widget buildSearchBar() {
 return Container(
   margin: const EdgeInsets.all(Sizes.dimen_10),
   height: Sizes.dimen_50,
   child: Row(
 	crossAxisAlignment: CrossAxisAlignment.center,
 	children: [
   	const SizedBox(
     	width: Sizes.dimen_10,
   	),
   	const Icon(
     	Icons.person_search,
     	color: AppColors.white,
     	size: Sizes.dimen_24,
   	),
   	const SizedBox(
     	width: 5,
   	),
   	Expanded(
     	child: TextFormField(
       	textInputAction: TextInputAction.search,
       	controller: searchTextEditingController,
       	onChanged: (value) {
         	if (value.isNotEmpty) {
           	buttonClearController.add(true);
           	setState(() {
             	_textSearch = value;
           	});
         	} else {
               buttonClearController.add(false);
           	setState(() {
             	_textSearch = "";
           	});
         	}
       	},
       	decoration: const InputDecoration.collapsed(
         	hintText: 'Search here...',
         	hintStyle: TextStyle(color: AppColors.white),
       	),
     	),
   	),
   	StreamBuilder(
       	stream: buttonClearController.stream,
       	builder: (context, snapshot) {
         	return snapshot.data == true
             	? GestureDetector(
                 	onTap: () {
                       searchTextEditingController.clear();
                       buttonClearController.add(false);
                   	setState(() {
                     	_textSearch = '';
                   	});
                 	},
                 	child: const Icon(
                  	 Icons.clear_rounded,
                   	color: AppColors.greyColor,
                   	size: 20,
                 	),
               	)
             	: const SizedBox.shrink();
       	})
 	],
   ),
   decoration: BoxDecoration(
     borderRadius: BorderRadius.circular(Sizes.dimen_30),
 	color: AppColors.spaceLight,
   ),
 );
}
3.Users – all the logged-in users can be shown using StreamBuilder. We also display the name and profile picture of the user with the use of the ListTile widget inside the ListView method.
Widget buildItem(BuildContext context, DocumentSnapshot? documentSnapshot) {
 final firebaseAuth = FirebaseAuth.instance;
 if (documentSnapshot != null) {
   ChatUser userChat = ChatUser.fromDocument(documentSnapshot);
   if (userChat.id == currentUserId) {
 	return const SizedBox.shrink();
   } else {
 	return TextButton(
   	onPressed: () {
     	if (KeyboardUtils.isKeyboardShowing()) {
           KeyboardUtils.closeKeyboard(context);
     	}
     	Navigator.push(
         	context,
         	MaterialPageRoute(
             	builder: (context) => ChatPage(
                   	peerId: userChat.id,
                   	peerAvatar: userChat.photoUrl,
                   	peerNickname: userChat.displayName,
                   	userAvatar: firebaseAuth.currentUser!.photoURL!,
                 	)));
   	},
   	child: ListTile(
     	leading: userChat.photoUrl.isNotEmpty
         	? ClipRRect(
             	borderRadius: BorderRadius.circular(Sizes.dimen_30),
             	child: Image.network(
               	userChat.photoUrl,
               	fit: BoxFit.cover,
               	width: 50,
               	height: 50,
                   loadingBuilder: (BuildContext ctx, Widget child,
                   	ImageChunkEvent? loadingProgress) {
                 	if (loadingProgress == null) {
                   	return child;
                 	} else {
        	           return SizedBox(
                     	width: 50,
                     	height: 50,
                     	child: CircularProgressIndicator(
                         	color: Colors.grey,
                         	value: loadingProgress.expectedTotalBytes !=
                                 	null
                             	? loadingProgress.cumulativeBytesLoaded /
                                     loadingProgress.expectedTotalBytes!
                             	: null),
                   	);
                 	}
               	},
               	errorBuilder: (context, object, stackTrace) {
                 	return const Icon(Icons.account_circle, size: 50);
               	},
             	),
           	)
         	: const Icon(
             	Icons.account_circle,
             	size: 50,
           	),
     	title: Text(
       	userChat.displayName,
       	style: const TextStyle(color: Colors.black),
     	),
   	),
 	);
   }
 } else {
   return const SizedBox.shrink();
 }
}
Building A Profile Page That Updates Information
On this page, users can add details about themselves, change their display names, and add contact info. Users can also click on the profile picture to change it and there is a button that updates the information on the database. The design resembles that of most chat app profile pages built by Flutter mobile app development services .
Let us see how this design is accomplished.
Step 1: ProfileProvider class
We add a class to our project structure and name it ProfileProvider. This class has two main functions as explained below:
To upload the picture to Firebase storage:UploadTask uploadImageFile(File image, String fileName) {
Reference reference = firebaseStorage.ref().child(fileName);
UploadTask uploadTask = reference.putFile(image);
return uploadTask;
}
To upload user information to the database:
Future<void> updateFirestoreData(String collectionPath, String path,
   Map<String, dynamic> dataUpdateNeeded) {
 return firebaseFirestore
     .collection(collectionPath)
 	.doc(path)
     .update(dataUpdateNeeded);
}
Step 2: Profile page
Inside the ProfilePage widget, there are three methods:
1. The first is the image picker method that selects a picture from the device and sets it as the profile picture.Future getImage() async {
ImagePicker imagePicker = ImagePicker();
// PickedFile is not supported
// Now use XFile?
XFile? pickedFile = await imagePicker
.pickImage(source: ImageSource.gallery)
.catchError((onError) {
Fluttertoast.showToast(msg: onError.toString())
});
File? image;
if (pickedFile != null) {
image = File(pickedFile.path);
}
if (image != null) {
setState(() {
avatarImageFile = image;
isLoading = true;
});
uploadFile();
}
}
2.The selected picture should be uploaded to the database and the URL should be saved under User Information in the database.
Future uploadFile() async {
 String fileName = id;
 UploadTask uploadTask = profileProvider.uploadImageFile(avatarImageFile!, fileName);
 try {
   TaskSnapshot snapshot = await uploadTask;
   photoUrl = await snapshot.ref.getDownloadURL();
   ChatUser updateInfo = ChatUser(id: id,
   	photoUrl: photoUrl,
   	displayName: displayName,
   	phoneNumber: phoneNumber,
   	aboutMe: aboutMe);
   profileProvider.updateFirestoreData(
   	FirestoreConstants.pathUserCollection, id, updateInfo.toJson())
   	.then((value) async {
 	await profileProvider.setPrefs(FirestoreConstants.photoUrl, photoUrl);
 	setState(() {
   	isLoading = false;
 	});
   });
 } on FirebaseException catch (e) {
   setState(() {
 	isLoading = false;
   });
   Fluttertoast.showToast(msg: e.toString());
 }
}
Deploying The App As A PWA
Finally, let us configure the app for making it ready to go on Firebase hosting so that anybody can start using it without having to install on their devices. You can deploy your chat app in other ways with the help of a Firebase app development company in India.
Step 1: Create Authorization Credentials
An application that makes use of 0Auth 2.0 to access Google APIs should have authorization credentials to identify it to the server. After running the command flutterfire configure, 0Auth 2.0 credentials will be configured for iOS, Android, and web. Go to the Credentials page and copy the client ID for the web app before proceeding.
Step 2: Google Platform Library
When you create a new Flutter app, a web folder gets automatically created in your project structure. Open your index.html file and enter the folowing script to load the Google Platform library.
<a href="https://apis.google.com/js/platform.js" <="" a="">">https://apis.google.com/js/platform.js"</a></a> async defer>
Step 3: Enter Client Id
Apart from the script, add the client ID you saved from the Credentials page.
<meta name="google-signin-client_id" content="YOUR_CLIENT_ID.apps.googleusercontent.com">
Step 4: Initialize Firebase Hosting
As we had configured the CLI commands during project initialization, we can run the hosting command directly in the Android Studio terminal.
$ Firebase init hosting
Running this command asks you to choose your project which you can do using the arrow keys.
The Firebase CLI will then ask you to input the name of the public directory. You can enter build/web
It will then ask whether you want to configure it as a single-page app. You can enter Y for Yes
Lastly, it will ask whether you want to configure GitHub integrations, automatic build, and deploy to hosting. For now, you can enter N for No. A Firebase app development company in India can help you customize these options to suit your requirements.
Now you can see two files firebase.json and .firebaserc created in your project.
Step 5: Add Files To The Web Folder
From the root of the project structure, run the below mentioned command in the terminal window to add the necessary files in the root directory.
$ flutter build web
Step 6: Upload Files To Firebase Hosting
Lastly, run this command to upload all the files to Firebase hosting and it will create an URL that anybody can access.
$ Firebase deploy
Conclusion
We hope this guide helps you understand how to build a Flutter chat app with Firebase integration. The step-by-step instructions given in this tutorial should help you add real-time capabilities to your Android chat application and set up features like authentication, push notifications, and crash reporting with the use of Firebase.